Find and Order Single Datasets of a Dataset Series
The Products Tab
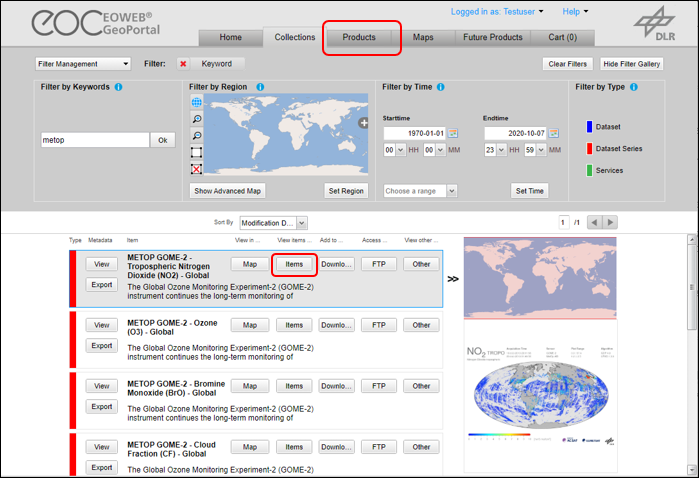
On the Products tab you can find and inspect single datasets of a dataset series. The Products tab can be entered by
- Selecting the Products tab from the tab panelNo filters from the Catalog Root View are transferred
- Clicking the “Items” button next to a dataset series entry in the listFilters from the Catalog Root View are transferred
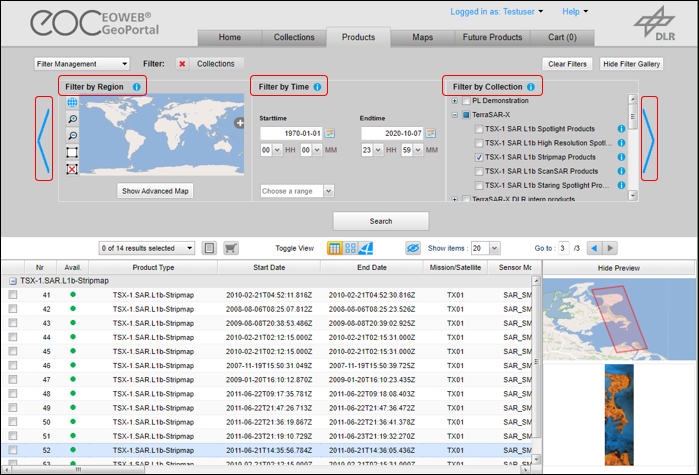
The datasets are presented in sections and can be restricted by applying different filters.
Filters
On the Products tab, filters may be activated and deactivated anytime, any number from zero to four and in any sequence. To apply the filters click the Search button.
Specified filters are displayed as buttons at the top of the tab.
Remove the filter by clicking on the “X” to the left of the filter button.
Moving the mouse over a filter button shows the actual filter settings as tooltip.
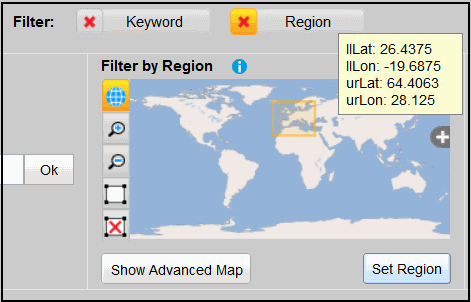
Filter by Region
You may reduce the number of catalog entries displayed by restricting the area of interest (AOI). This can be done by drawing a rectangle, by selecting a predefined region, by inserting coordinates of a bounding box, by importing an AOI or by searching a location.
Specifying an AOI by drawing: Click on the draw button and draw a rectangle by click-and-drag.
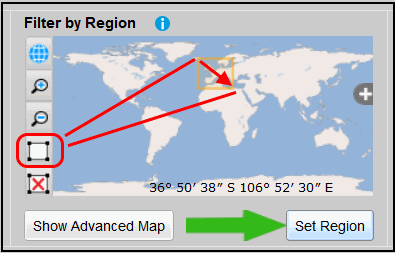
Redraw by just repeating the procedure and “Set Region” activates the region filter.
Move the map by click-and-drag when the draw button is not selected.
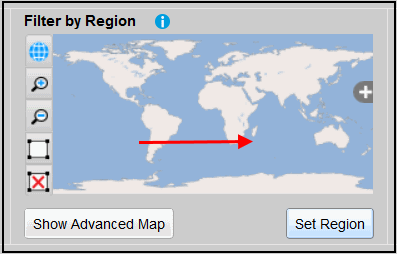
You may also zoom in or out or remove the current AOI by clicking on the respective buttons to the left of the map.
For more possibilities to select regions, open the advanced map.
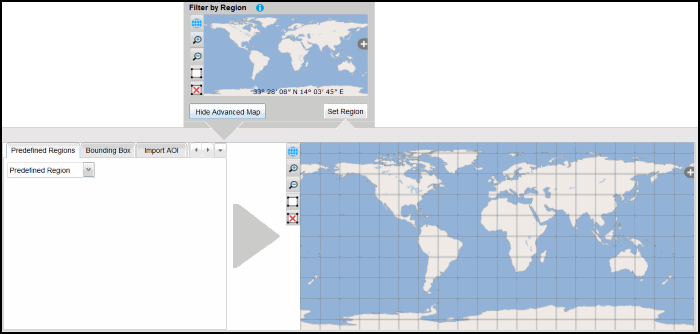
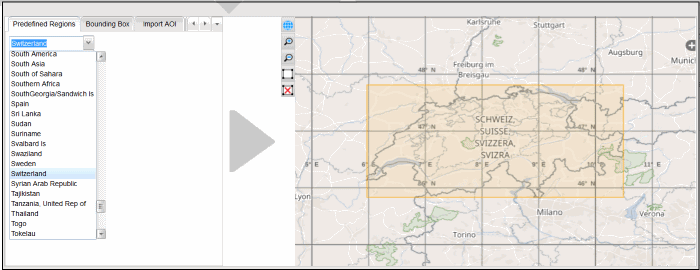
There you can select a predefined region from the drop-down list.
Or the coordinates for a bounding box will be inserted.

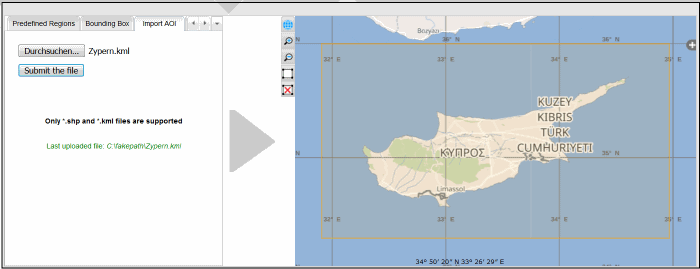
You can also import another AOI like shape file or kml file. The coordinates have to be specified using WGS84. The AOI is then set to the outer rectangle bounding box of the specified shape/kml (i.e. min/max latitude and min/max longitude).
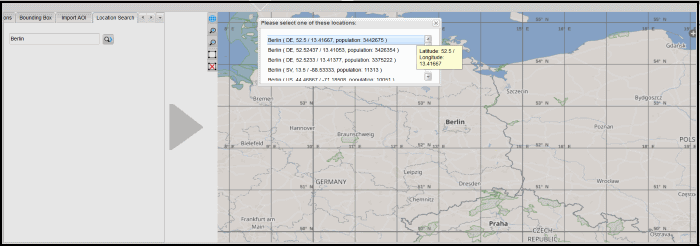
Perhaps you want to search a location.
For all inputs, “Set Region” activates the region filter
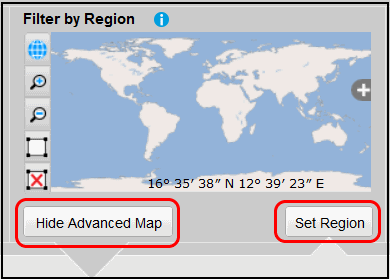
and the hide button closes the advanced map window again.
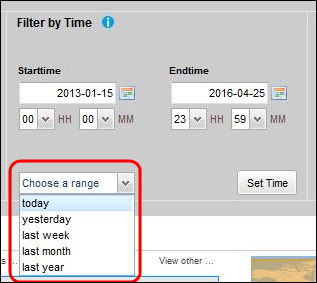
Filter by Time
You may also impose a time constraint on the catalog entries by selecting a date and/or time range using the date picker and time drop-down lists. Alternatively, the date can also be set directly by typing into the date fields.
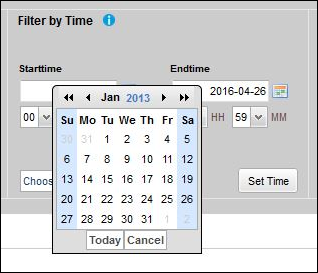
“Set Time” activates the date / time constraint.
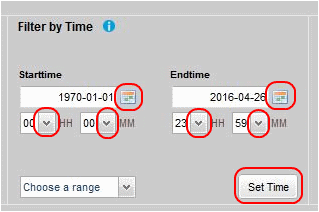
Choose range in a drop-down list.
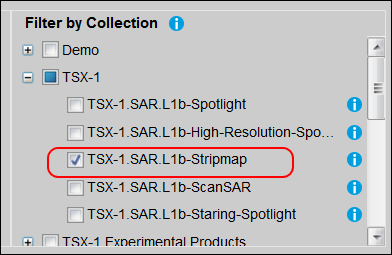
Filter by Collection
This filter allows you to restrict the displayed catalog entries to collections (i.e. dataset series) by marking the respective collection.
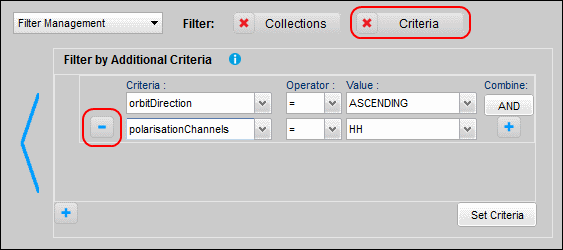
Filter with advanced criteria
If only one single collection is selected in the collection filter area, an arrow is displayed to the right of the collection filter area.
Clicking on the arrow scrolls the filter region to the advanced criteria filter. Here you can add additional restrictions to the presented datasets. The available restrictions depend on the selected collection.
To add a filter click on the “+” icon, select the restricting criteria from the drop-down list of available criteria, and enter or select a value. The available criteria depend on the selected collection.
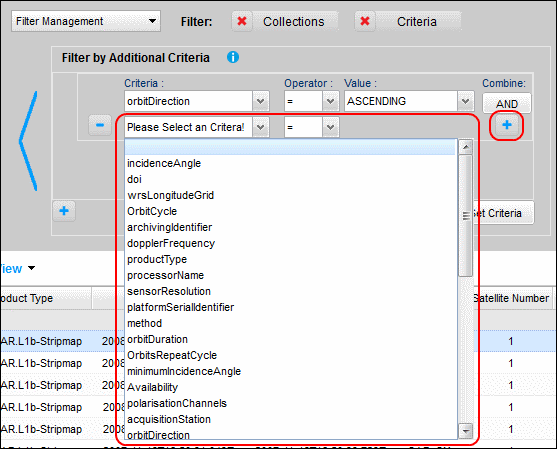
To remove a single advanced criteria click on the “-” button to tho right of the respective criteria. To remove all advanced criteria click on the “X” to the left of the filter button.
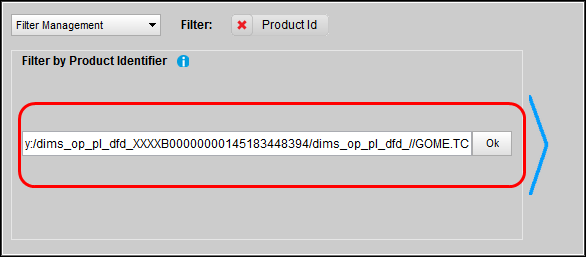
Filter by Product Identifier
To scroll to the Product Identifier filter click the arrow left of the region filter area.
To apply the filter, add a product identifier in the input field and click the “Ok” button. All other filters are disabled.
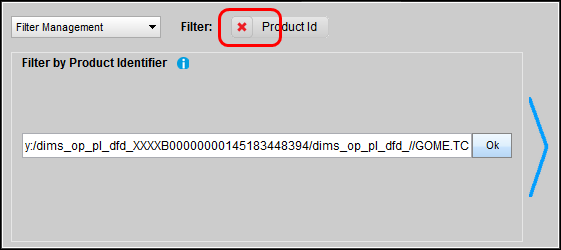
To remove the product identifier, filter click on the “X” to the left of the filter button.
Filter Management and Sorting
The image below shows the Products tab with four filters active. You see four filter deactivation buttons.
You may deactivate a filter independently from the other filters in order to receive more dataset entries. Or you may reactivate it with other constraints.
Pushing the “Clear Filters” button deactivates all filters.
You may save the currently active filter constellation for later reuse, load (i.e. activate), or delete a previously saved filter constellation.
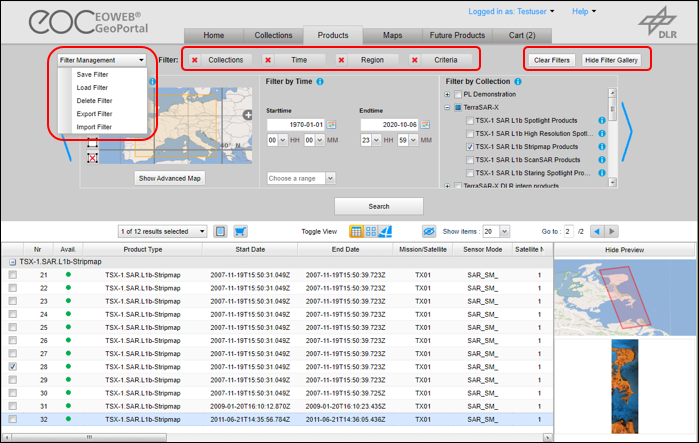
The “Hide Filter Gallery” button saves screen space but leaves the filter setting unchanged.
Push “Show Filter Gallery” to redisplay the filter settings.

The Dataset Entries
Switching Views
The datasets matching the filter settings are presented below the filter area. You can switch between the following views for the datasets by clicking one of the “Toggle View” buttons.
- Table View
- Quicklook View
- Footprint View
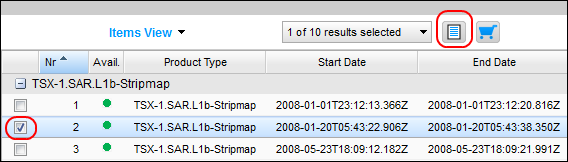
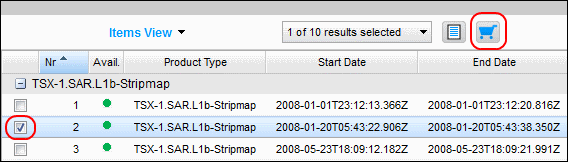
Table View

In the table view some metadata parameters are listed. There is always one entry selected (the one with light blue background), with an extent overview map and a preview image attached to the right. Only the preview for the selected item is shown.
The green dot in the second table column indicates whether you are authorized to order this dataset.
Products marked in the table view are also marked in quicklook and footprint view.
Quicklook View
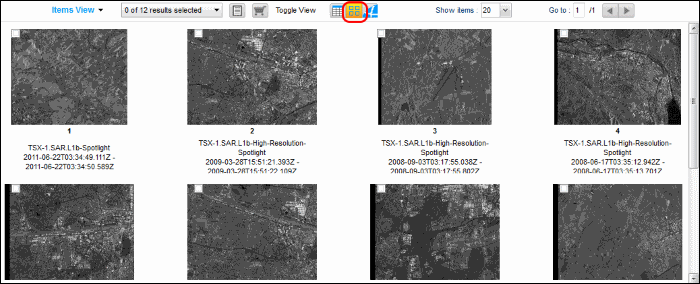
In the Quicklook View the preview images are shown.
Products marked in the quicklook view are also marked in table and footprint view.
Footprint View
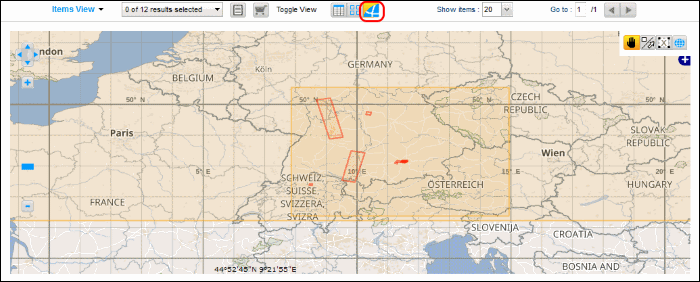
In the Footprint View the geographical coverage of each product is shown on the map.
Products marked in the footprint view are also marked in table and quicklook view.

|
Use the mouse to drag the map to a new position |
| Activate Select Box / Mouse Selection | |

|
Deactivate Selection |

|
Zoom to global view |
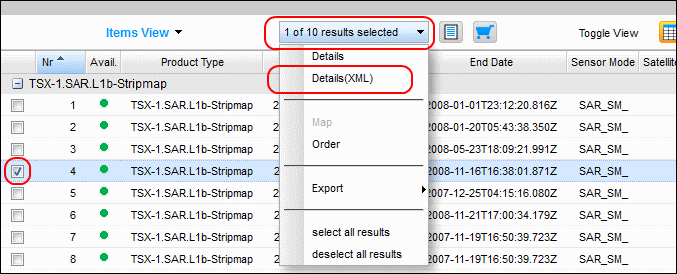
View Metadata of datasets
To view the metadata, mark the respective datasets and click the “Details” button above the table or use drop down menu above the table and select “Details”. A new browser window/tab is opened, displaying the complete set of metadata.
To view the metadata as XML (ebrim format), mark the respective datasets and select the “Details (XML)” menu item from the drop down menu above the table. A new browser window/tab is opened displaying the complete set of metadata in XML format.
Order datasets
To order datasets, mark the respective datasets and click the “Order” button above the table or use drop down menu above the table and select “Order”.
Set Order Options
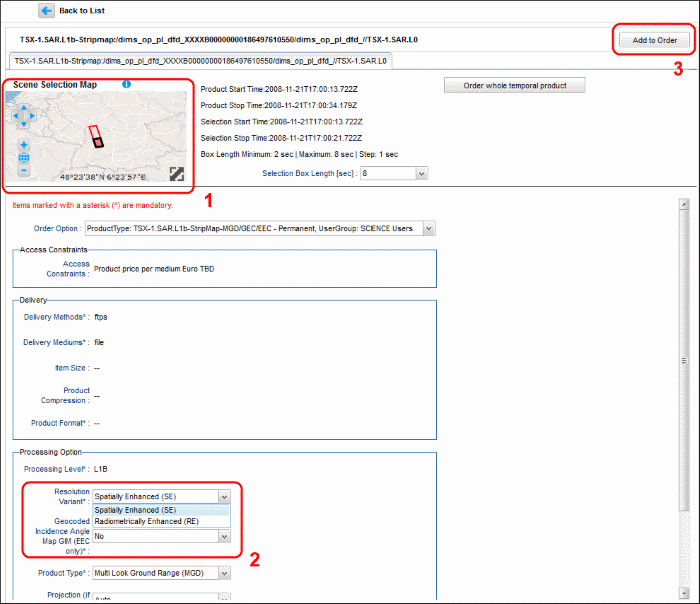
Before the product is added to the cart, you may further specify the product to be ordered. You can specify a scene subset (1) (if applicable for the product) or set any other selectable option on this form (2). Once you have finished your specification click the “Add to Order” button (3). This adds the product to the cart.
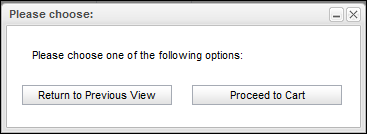
A popup box appears asking you if you want to continue with specifying products and adding them to your order or if you want to enter the next step towards the download, opening your shopping cart, i.e. the Cart tab.
Export data
To export data, mark the respective datasets, use drop down menu above the table and select “Export>”, where you can choose between “CSV (Excel)” and “KML”-format.

The Cart Tab
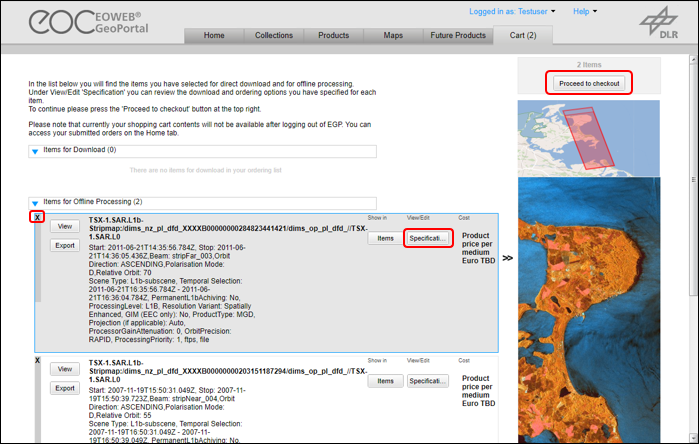
The Cart resides in its own tab so you can easily open it from anywhere in EGP. If you proceed to the Cart you will see a list of order items.
Click on the “X” (close) button to remove an order item from the cart.
You may also click on the “Products” tab and add more order items.
Order Dataset Entries
If you want to modify an order item, then click on the respective “Specification” button.
When you are finished, click on the “Update Order” button to return to the order item list.

If your order is complete, then “Proceed to checkout”.
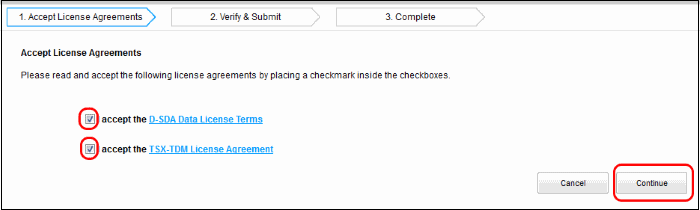
Next you are asked to accept one or more license agreements. Accept the license agreements by clicking on the check boxes and continue to the “Submit” form.
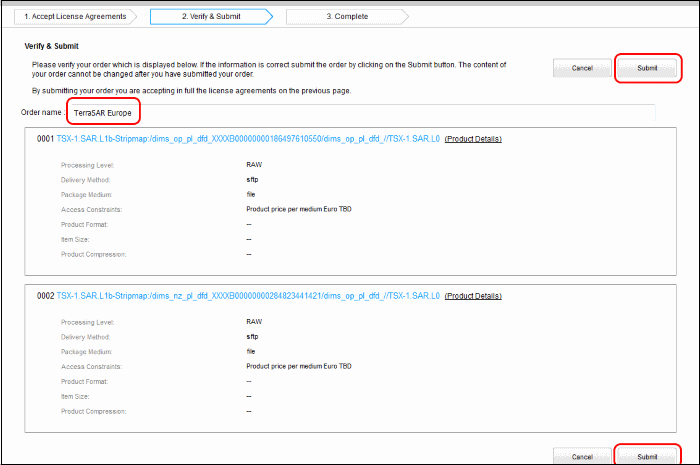
Here you can check your order, give your order a name, and submit it.
After successful submission, an order confirmation containing the order identifier is displayed.
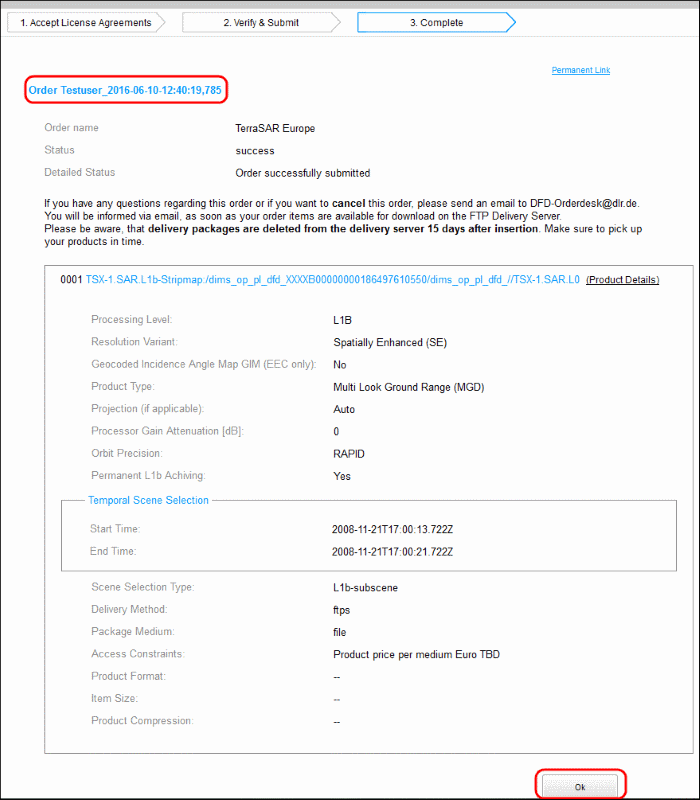
Clicking the “Ok” button will bring you to the EGP Home tab where you have access to your order details.
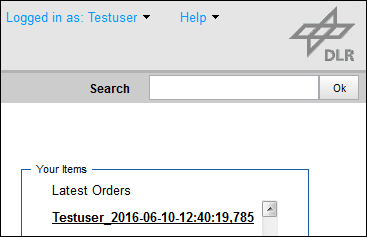
Repeat Order
To repeat order, go to home tab (see chapter 2) and see on the right hand side in the box “Your Items”, where you can access your old orders. Clicking “more...” leads you to a dialog, where you can set a time range for the orders you want to search for. The Search outputs a list of your orders. Click on any of the orders to get order info output and at the bottom of that output you find the “repeat order” function.