Exploring Map Features
The Map Tab
On the Map tab several WMS layers can be combined to a view. You can add/remove layers, change the display order of the layers, change the time instance of layers, etc.
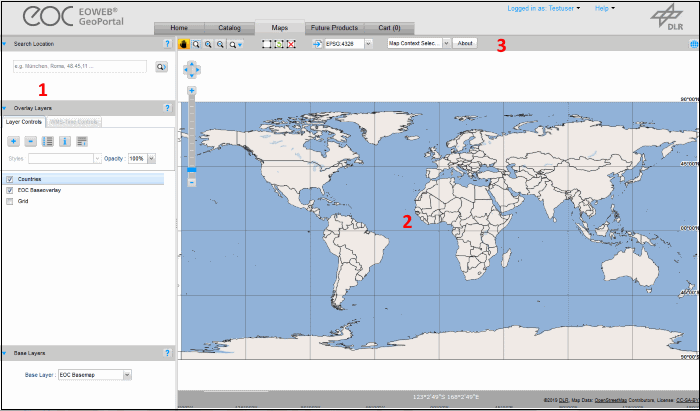
On the left side of the Map tab are sections for specifying the map contents (1). The map is shown in the center (2). The map toolbar is shown above the map (3).
Layers on the Map
Show Overlay Layers on the Map
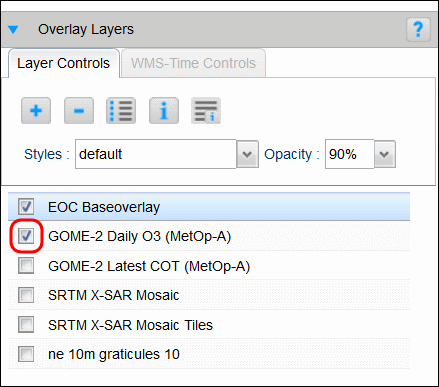
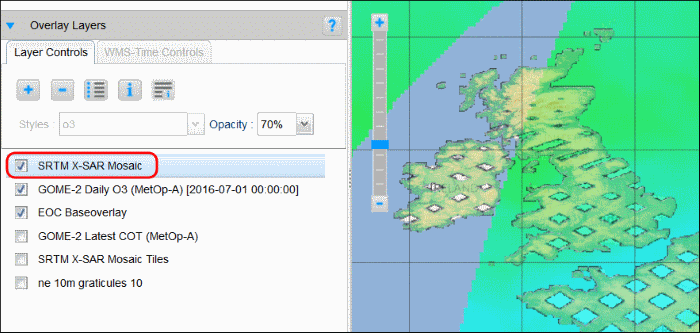
To display a layer listed in the overlay layers section perform the following steps:
- Click the checkbox left to the layer name.
- Removing the checkmark again hides the layer from the map.
- Right-click on a layer and select “Show Layer / Hide Layer” from the pop-up menu.

Change the Order of Overlay Layers
The layers of the overlay layers list are shown in the same order on the map. The top-most layer in the list is shown on top on the map.
To change the order of the overlay layers perform the following steps:
- Left-click on a layer name
- Drag and drop it above/below another layer in the list.
Add an Overlay Layer
There are three ways to add additional layers to the map.
Adding a layer from a metadata entry of the Catalog tab. See Display Items on the Map.
Adding a pre-configured layer
- Click the “+” icon above the overlay layer list.
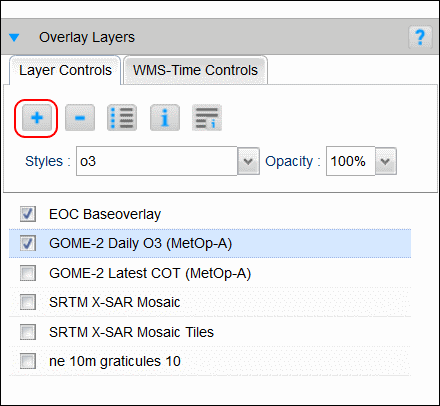
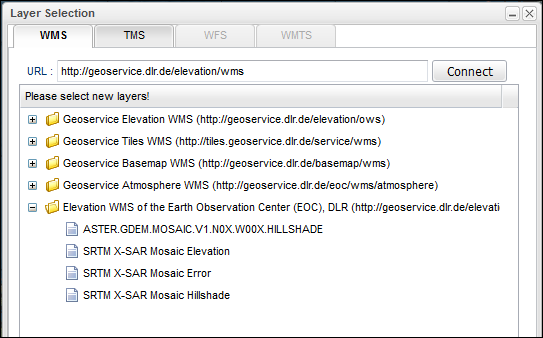
- A layer selection window is opened listing some pre-configured WMS Servers.
- Click on the “+” icon to expand the list of layers provided by the WMS Server.
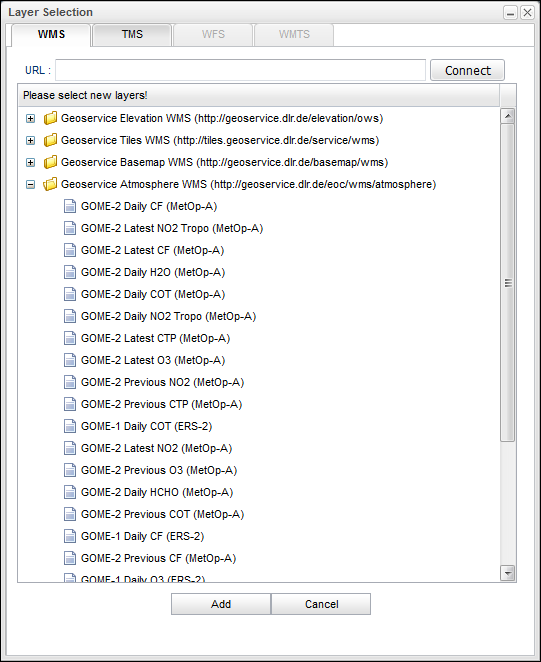
- Select one of the listed layers and click the “Add” button to add the layer to the map.
For adding a layer from a Tile Map Service (TMS), please use the “TMS” tab at the layer selection window.
Adding a layer from any WMS Server
- Click the “+” icon above the overlay layer list.
- In the layer selection window add the URL of the WMS server
- Click connect.
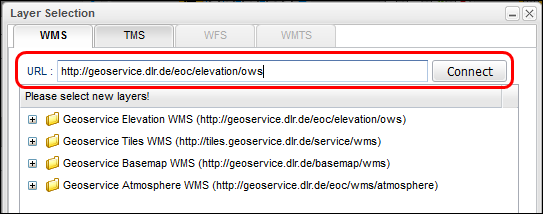
- The specified WMS Server and its layers are added to the list.
- Select one of the listed layers
- Click the “Add” button to add the layer to the map.
For adding a layer from a Tile Map Service (TMS), please use the “TMS” tab at the layer selection window.
Remove an Overview Layer
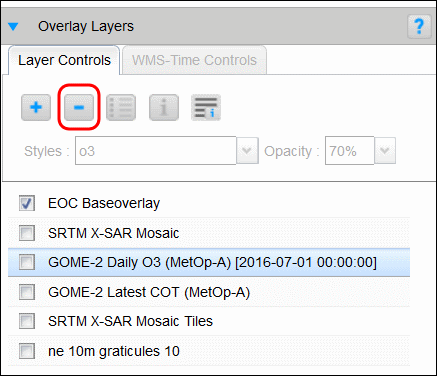
To remove a layer from the layers listed in the overlay layers list perform the following steps:
- Select the layer to be removed
- Click the “-” icon above the layer list
Alternative:
- Right-click on the layer to be removed and select “Remove Layer” from the pop-up menu (see pop-up-menu).
Show the Legend of a Layer
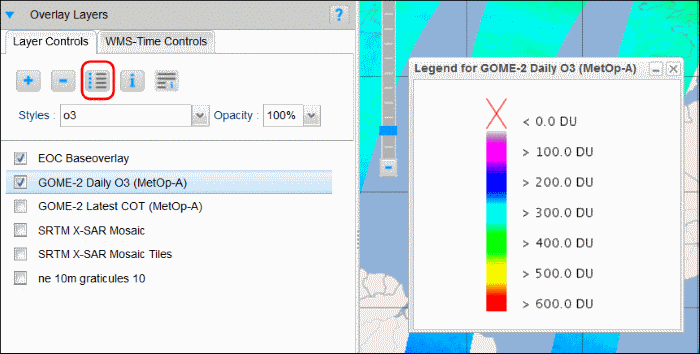
To show the legend of a layer, perform the following steps:
- Select the layer of interest
- Click the legend icon above the layer list
Alternative:
- Right-click on the layer and select “Show Legend Window” from the pop-up menu (see pop-up-menu).
Show WMS Feature Information
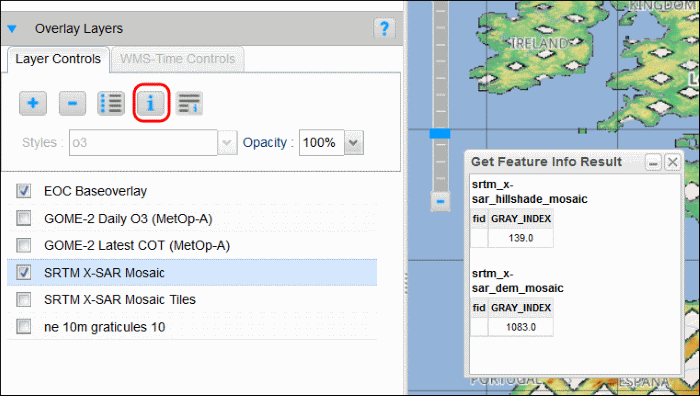
To show the WMS feature information perform the following steps:
- Select the layer of interest
- Click the “i” icon above the layer list
- Click on a point on the map
Alternative:
- Right-click on the layer and select “Activate WMS GetFeatureInfo” from the pop-up menu (see pop-up-menu).
Show Layer Metadata
To show the layer metadata perform the following steps:
- Select the layer of interest
- Click the last icon in the layer list
- Click on a point on the map
Alternative:
- Right-click on the layer and select “Show Layer Metadata” from the pop-up menu (see pop-up-menu).
Update Layer Information
To update the layer information perform the following steps:
- Select the layer of interest
- Right-click on the layer and select “Update Layer Information” from the pop-up menu
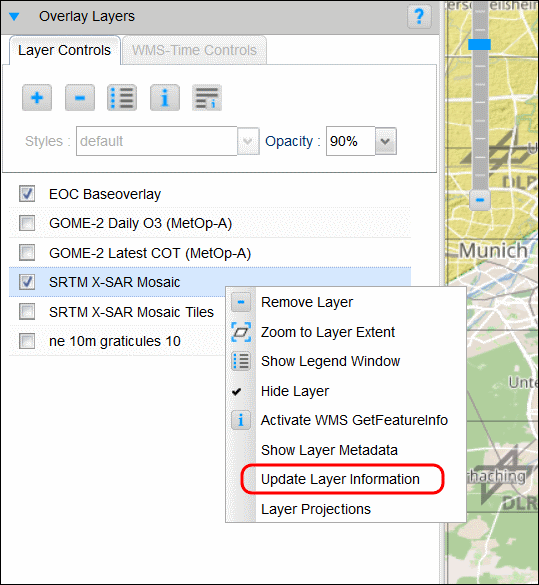
Layer Projections
To show the layer projections perform the following steps:
- Select the layer of interest

- Right-click on the layer and select “Layer Projections” from the pop-up menu (see pop-up-menu).
Zoom to Layer Extent
To zoom to the layer extent, perform the following steps:
- Right-click on the layer of interest
- Select “Zoom to Layer Extent” from the pop-up menu (see pop-up-menu)
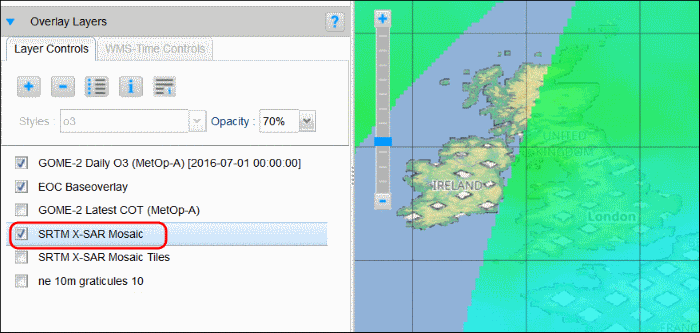
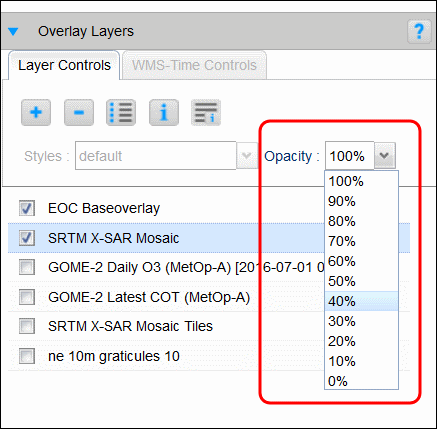
Change the Opacity of a Layer
To change the opacity of a layer, perform the following steps:
- Select the layer of interest
- Change the opacity value in the “Opacity” drop-down box above the layer list
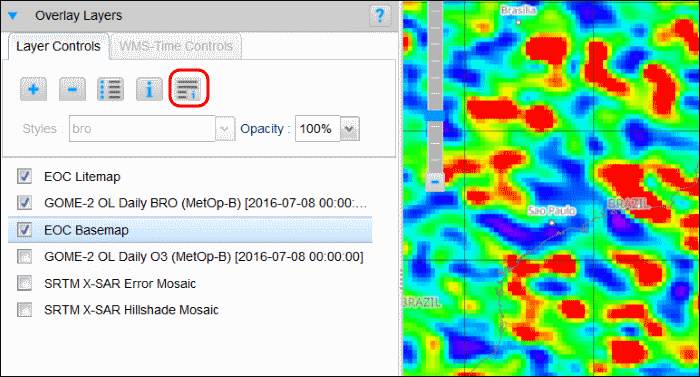
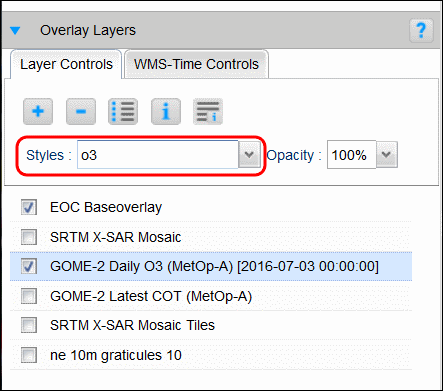
Change the Display Style of a Layer
To change the display style of a layer, perform the following steps:
- Select the layer of interest
- Change the value in the “Styles” drop-down box above the layer list
Note
The availability of different styles depends on the data set. If there is only one style displayed in the drop-down box, no other styles are available for the data set.
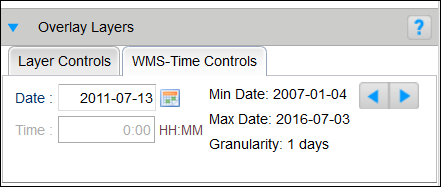
Show a Layer at Different Instances of Time
For dataset series, data are available for different instances in time. A layer displayed on the map always shows one instant of time.
To change the time, perform the following steps:
Select the layer of interest
If the layer belongs to a dataset series that has different instances of time, the “WMS-Time-Controls” tab above the layer list is enabled.
Change to the “WMS-Time-Controls” tab
Select the time instance of interest either by
- Specifying date / time directly in the text fields or with the help of the calendar tool
- Use “Forward” / “Back” buttons at the right.
Change the Map Background
To change the map background, i.e. the base layer, perform the following steps:
- Click on the arrow icon of the “Base Layer” drop-down box
- Select one of the offered base layers

Center the Map to a Particular Location
To show a particular location on the map, perform the following steps:
- Enter a place name or coordinates in the “Search Location” input field and click the search icon. The map is centered and zoomed to the location
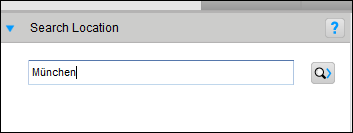
- If more than one location is found, a list pops up. The results are ordered by descending population
- Select the location of interest. The map is centered and zoomed to the selected location.

For coordinates input, the following formats are supported:
- 40.446195, -79.948862
- 40.446195N 79.948862W
- 40°26‘47”N 79°58‘36”W
- 40° 26.7717, -79° 56.93172
- 40:26:46N,79:56:55W
- 40:26:46.302N 79:56:55.903W
- 40d 26’ 47” N 79d 58’ 36” W
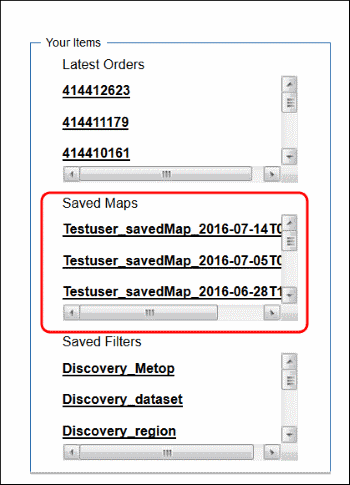
Save a Map
You can save the current map with the selected overlay layers for later visits. To save the map click the “Export” button above the map.

You can also print the map with the export menu.
The current map is added with a timestamp to the list of maps which is available on the Home tab. You can load a map from this list by just clicking on the map title.
The Map Toolbar
The map toolbar is located above the map.

The meaning of the map toolbar buttons is listed in the following table.

|
Pan the map |

|
Zoom to an area defined with the mouse |

|
Zoom in |

|
Zoom out |

|
Drop-down menu for some map functions |

|
Draw a rectangular area of interest on the map |

|
Restore deleted area of interest |

|
Delete area of interest |

|
Export or Save the Map |
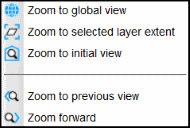
Drop-down menu for some map functions:
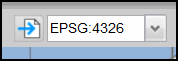
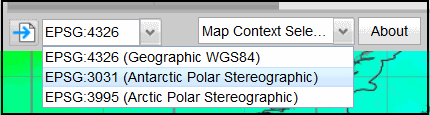
Drop-down menu for EPSG choice:
Drop-down menu for selection of map context:
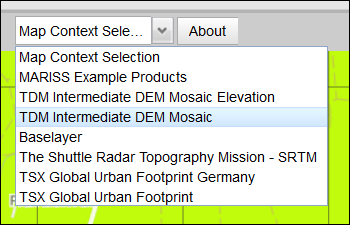
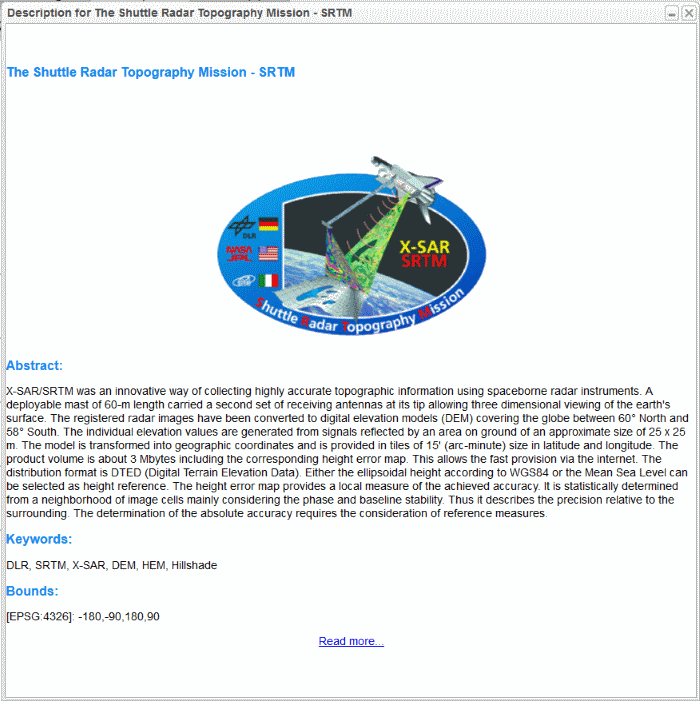
Click “About”-button to get description about the map context: